Excel Microsoft 365 Download for Free – 2024 Latest Version
| Microsoft 365 | |
| Windows, Mac, Linux, iOS, Android | |
| Free Trial | |
| Microsoft | |
| 2,827,984 | |
| Office and Business Tools, Writing and Editing Tools |

•
Fact-checked by Justyn Newman
Finding a free version of Excel has proven to be an impossible task. Despite my best efforts, I was unable to locate a legitimate free version of Microsoft’s powerful spreadsheet tool. The only options I found were either pirated versions or malware-ridden downloads. There is a limited online version of Excel that Microsoft offers for free after creating an account. Unfortunately, this version lacks many of the advanced features, macros, and formatting styles that separate Excel from second-tier spreadsheet programs.
However, I did find a way to get Excel free for one month, including all of the advanced features. This gave me plenty of time to organize my data, create charts, and more without having to make any payment.
Follow the steps below, and I’ll show you how to download the full version of Excel free for one month.
Download Excel for Free for 1 Month!
How to Download and Install Excel on Your PC for Free
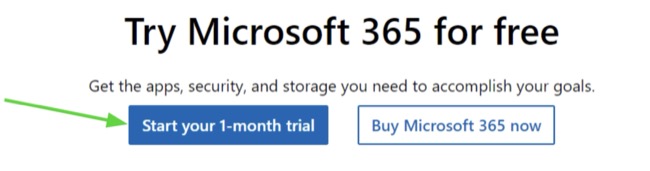
- Go directly to the official Microsoft 365 free trial page.
- Click the Start Your 1-Month Trial button.
![Microsoft 365 for free]()
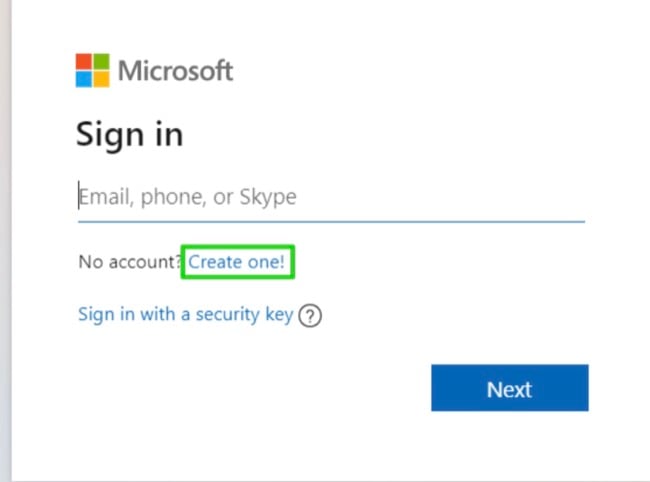
- If you have an existing Microsoft account, sign in. If not, create a new account. You must use a real and active email address when creating your account as Microsoft will send a verification code.
![Excel 365 sign in form screenshot]()
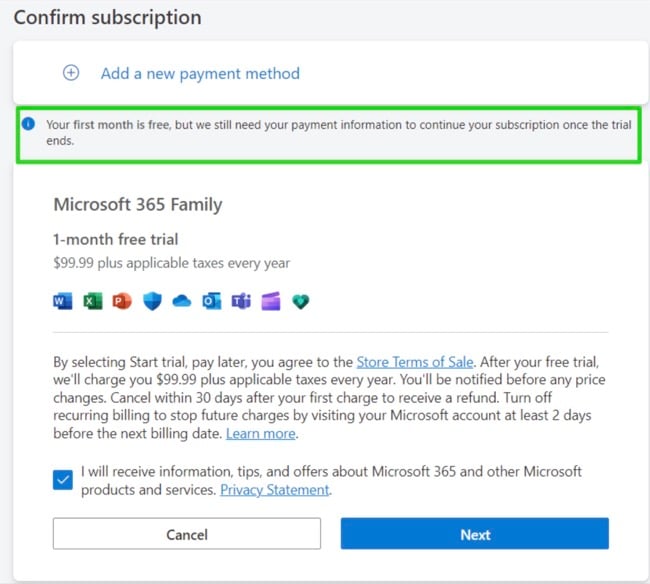
- Add your credit card or PayPal information and press Next. Confirm your intention to start the free trial, and click Next. While this is a requirement to activate your account, you won’t be charged until after the free trial is completed.
![Excel 365 confirm subscription screenshot]()
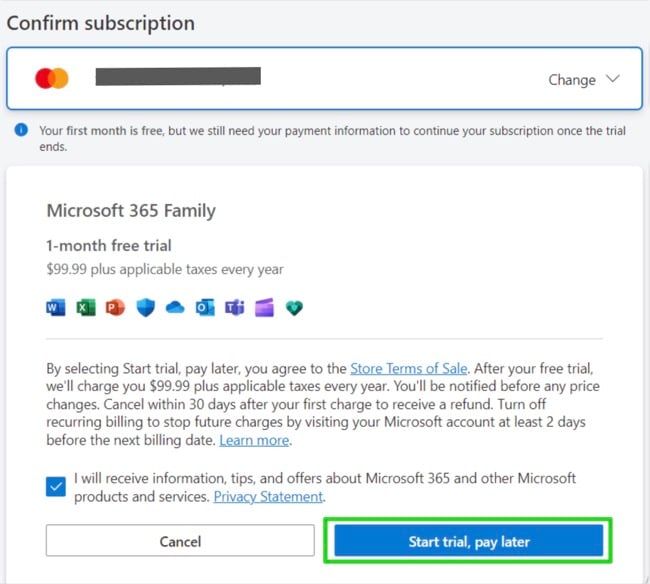
- Press the Start Trial, Pay Later button.
![microsoft 365 free trial payment confirm]()
- Once your payment method is verified, press the Get Started button.
- Click Download the Desktop Apps and the Microsoft account page will open in a new tab.

![Excel 365 download desktop apps screenshot]()
- Accept the terms of the Privacy Policy and press Continue.
- Click Install Office to begin the Excel download process.
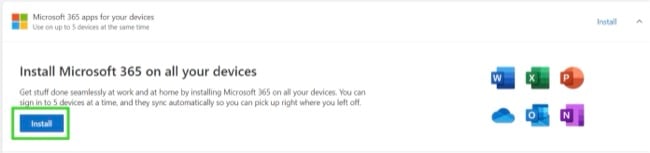
![Excel 365 install on all your devices screenshot]()
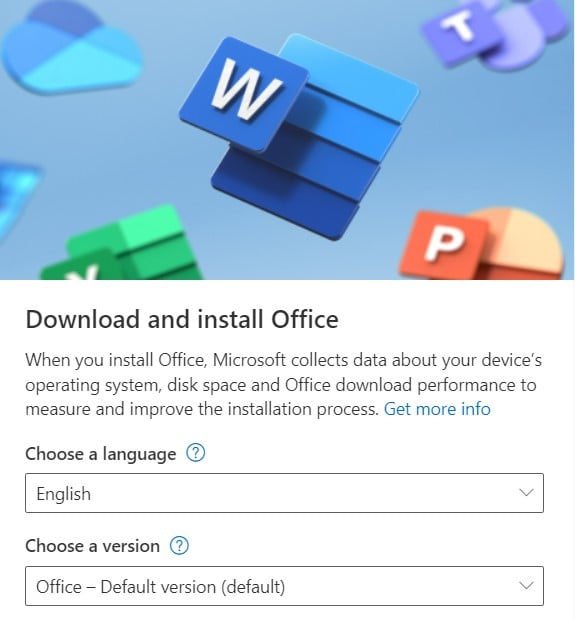
- Choose the destination folder where you want the Office file to download
![]()
- When the download is complete, open the file, and Microsoft will automatically install the entire collection of Microsoft 365 apps to your computer.
Excel Overview
In 1985, Microsoft introduced Excel as a basic spreadsheet tool with limited functionalities. Over time, Microsoft has consistently improved Excel by adding new elements like charts, intricate formulas, and enhanced formula calculation capabilities to expand its functionality.
As the software evolved to meet the growing demand, it became the gold standard of spreadsheet tools. Microsoft improved the UI in 2007 with the “ribbon style” header, making it easy for people to access its features.
The latest version of Excel includes even more advanced features and capabilities, such as Power Query, Power Pivot, and Power BI. These allow for more powerful data analysis and visualization.
Excel Features
Excel is a user-friendly software that offers various features for evaluating and organizing data in spreadsheets. Although it may require some time to fully grasp its different functionalities, once you gain a solid understanding of Excel, you’ll realize that it operates on a logical and straightforward basis.
As a part of Microsoft 365, sharing spreadsheets and collaborating with others is simple. All progress is automatically saved to the OneDrive cloud storage, so you can share it with others, without having to email the document as an attachment.
Formulas and Functions Simplify Data Calculations and Analysis
Excel offers a wide range of built-in formulas and functions that can be used to perform calculations on data in a spreadsheet. These include basic mathematical operations such as addition, subtraction, multiplication and division as well as more advanced functions like SUM, AVERAGE, COUNT, MIN, and MAX.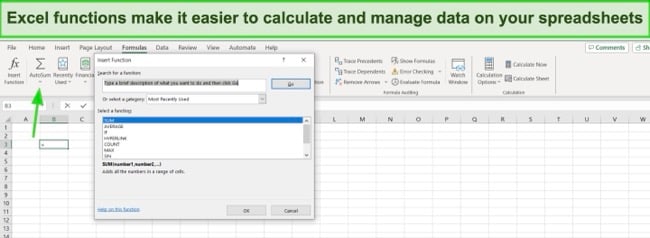
Excel also includes financial functions like PV, FV, PMT, and statistical functions like COUNTIF, SUMIF, and AVERAGEIF. These functions can be used to perform calculations on data in a spreadsheet, and can be combined to create more complex formulas.
Quick Data Visualization with Charts and Graphs
It’s easy to add charts and graphs to add a visual perspective to display your data. All you have to do is highlight the data you want in the chart and click on the graph or chart style you prefer. There is a wide variety of chart types, including column, bar, line, pie, area, scatter, and more.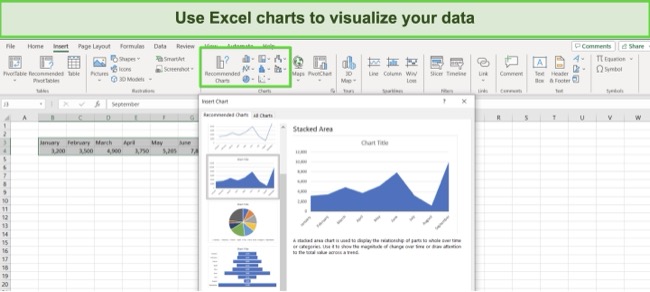
You can drag and drop the chart anywhere you want on the spreadsheet, adjust the colors, and change the data. This makes it easy to see patterns and trends in the data, which can be useful for making decisions and presenting information to others.
Use PivotTables to Summarize and Analyze Large Data Sets
Pivot tables are a powerful tool in Excel that allows you to summarize and analyze large amounts of data. They can be used to group data by different criteria and to create cross-tabulations and other summary views of the data.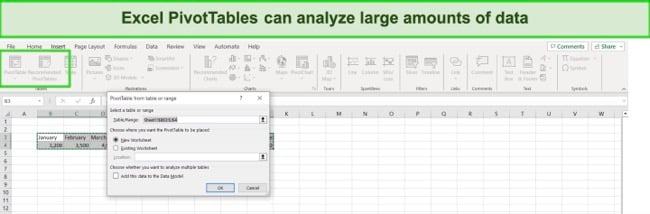
Pivot tables can be created by selecting the data you want to analyze, then clicking on the “Insert” tab and selecting “PivotTable” from the “Tables” group. Once the pivot table is created, you can drag and drop fields to the different areas of the pivot table to create different views of the data.
Highlight important data with Conditional formatting
The conditional formatting feature simplifies the process of applying formatting to cells based on certain conditions. This can be used to highlight important data, or to make it easier to spot patterns and trends. For example, you can use conditional formatting to highlight cells that are above or below a certain value or to highlight cells that contain specific text.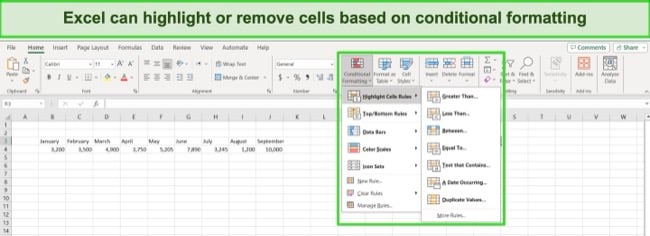
Conditional formatting can be applied by clicking on the “Home” tab and then selecting “Conditional Formatting” from the “Styles” group.
Macros Can Automate Repetitive Tasks
Excel macros are a simple way to automate repetitive tasks in a spreadsheet. They can be used to perform complex calculations, to manipulate data, or to automate other tasks that are performed frequently. They are created by recording a sequence of actions in Excel and then saving it as a macro. Once created, you can run macros by clicking on the “View” tab, selecting “Macros” and then choose the ones you want to run.
Data Validation Prevents Mistakes and Simplifies Data Entry
Excel has data validation tools within its platform, allowing you to establish rules for data entry in spreadsheets. By doing so, you can guarantee accurate data input and avoid potential errors. With data validation, you can also implement convenient drop-down lists, simplifying the process for others to enter data correctly.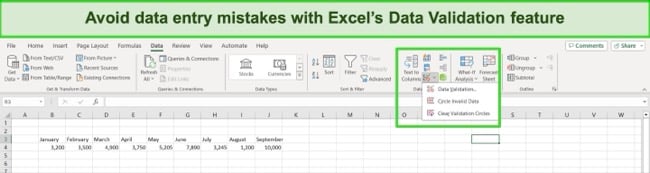
You can set up rules such as only allowing numbers within a specific range, or only allowing certain text entries. Data validation can be applied by clicking on the “Data” tab and then selecting “Data Validation” from the “Data Tools” group.
Excel Compatibility
Microsoft Excel has been crafted to smoothly operate alongside various modern operating systems, excluding Linux. The installation process on Windows 7, 8.1, and 10 is uncomplicated and doesn’t present any intricate challenges. Mac users, on the other hand, should ensure they have macOS Sierra (10.12) or a more recent version. Although it might be possible to run Excel on older operating systems, it’s worth noting that this could potentially result in performance issues or system instability.
Mobile Apps
You can download Excel as a standalone app on Android and iOS. It has an intuitive interface, making it easy to use on the smaller screens. While most of the formulas, charts, and features are available on the mobile, there are some features, such as macros and some advanced functions.
Minimum System Requirements
Before downloading Word, make sure that your computer meets the system requirements.
Windows
| Operation System | Windows 7, 8.1, 10, and 11. Windows Server 2016 and 2019 |
| Processor | 2-core 1.6 GhZ or faster |
| Memory | 64-Bit system: 4 GB 32-Bit system: 2 GB |
| Hard Disk Space | 4 GB |
| Display | 1280 x 768 screen resolution |
| Graphics | DirectX 9 or later |
Mac
| Operation System | MacOS 10.12 Sierra and later |
| Processor | Intel processor |
| Memory | 4 GB of RAM |
| Hard Disk Space | 10 GB |
| Display | 1280 x 800 screen resolution |
| Graphics | No graphic card required |
Mobile Apps
| Android | Android 7.0 and higher |
| iOS | iOS 13 and higher |
Browser
For the best performance, it’s recommended to use the latest version of Chrome, Firefox, Edge, or Safari.
Is The Web Version of Excel Good?
If you have a free Microsoft account, you can use a free online version of Excel through the Microsoft 365 website. However, there are some downsides to the online version:
- Limited functions and formulas: Many of the advanced formulas and functions are not available, plus the selection of charts and graphs is limited.
- Different formatting options: With limited formatting options, it can be difficult to customize the data to your needs. Additionally, it may display differently when shared with someone viewing it on a desktop app.
- No macros: There is no option to automate repetitive tasks.
- Internet connection required: You must have a stable internet connection to view or edit any spreadsheet. If you’re working and the internet goes out, the page will instantly lock, and turn to View Only.
How to Uninstall Excel
If Excel isn’t the right spreadsheet tool for your needs, you can uninstall it in a few simple steps.
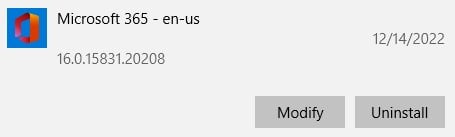
- Type Add or Remove Programs in the Windows search bar and press Enter.
- Locate Microsoft 365 and press the Uninstall Button.
![Uninstall Microsoft 365]()
- Confirm that you want to remove the software, and the uninstallation wizard will uninstall it from your computer.
Keep in mind that this will remove all the Microsoft 365 apps and not just Excel. When it is completed, you will need to restart your computer. Uninstalling Excel from your computer will not cancel your Microsoft 365 account, that must be done by logging in to your Microsoft 365 account.
Additional Microsoft 365 Apps
In addition to a great collection of productivity software, Microsoft 365 comes with 1 TB of OneDrive cloud storage for each user.
- Word: The gold standard in word processing, Word comes with a host of essential features, such as grammar and spell check, formatting options, a wide selection of fonts, and templates for everything from resume writing to creating marketing materials.
- PowerPoint: You can be as creative as you want or work on a pre-made template. Whatever you choose, PowerPoint will help you create a good-looking presentation. There is no limit to the number of slides per presentation, and you can use animations and transitions to help bring your presentations to life.
- Outlook: Keep your calendar, to-do lists, meeting scheduler, and email all in one app with Outlook. The software allows you to send emails from multiple accounts, so you only need one app for sending personal and professional emails.
FAQ
Is there a free version of Excel?
Can Excel open CSV files?
How to use VLOOKUP in Excel?
- In the cell where you want the VLOOKUP result to appear, type the following formula:
=VLOOKUP(lookup_value, table_array, col_index_num, [range_lookup]) - Replace the following commands with the appropriate values:
lookup_value: The value you want to look up in the table.
table_array: The range of cells that contains the data you want to look up.
col_index_num: The column number in the table_array that contains the return value.
[range_lookup]: (Optional) A logical value that specifies whether you want an approximate or exact match. TRUE for an approximate match, FALSE for an exact match. - Press Enter and the data you’re looking for will appear in the cell.
How can I remove duplicates in Excel?
How can I lock cells in Excel?
If you want to ensure that no one is making changes to the data or formulas on a specific cell or a group of cells, you can use the Format settings to lock them.
- Select the cells you want to lock.
- Click the Format tab.
- In the Cells group, click the Format button.
- Click Protection.
- In the Protection dialog box, check the Locked box.
- Click OK.
How to create a drop down list in Excel?
Drop-down lists can make it easier for users to enter data into a spreadsheet. They can also ensure that data is entered in a consistent format.
- Select the cell where you want the drop-down list to appear.
- Click the Data tab.
- In the Data Tools group, click the Data Validation button.
- In the Data Validation dialog box, select the List data type.
- In the Source box, type the list of items you want to appear in the drop-down list.
- Click OK.
How to split cells in Excel?
Splitting cells can be useful for organizing data into a more manageable format. For example, you could split a cell that contains a full name into separate cells for first name, last name, and middle initial.
Start by clicking on the cells you want to split. Then, open the Data tab and click the Text to Columns button. In the Text to Columns Wizard, select the Delimited option and click Next. Choose the delimiters that separate the data in the cells, and click Next. Finally, select the data format for each column and press the Finish button.

GuideHaven is reader-supported so we may receive a commission when you buy through links on our site. You do not pay extra for anything you buy on our site — our commission comes directly from the product owner. Some providers are owned by our parent company. Learn more.
